Friday 25 June 2010

Weathering Tanks - Kreig Stylee!

I've often benefited from reading someones helpful tutorial on their blog. It occurred to me that i haven't contributed to the blogging community with a helpful (or unhelpful!) tutorial of my own!

I've been asked once or twice at my gaming club how i weathered my Kreig tanks. This will now form the basis of my first tutorial! I hope fellow Korpsmen and gamers at large will benefit from this as well!

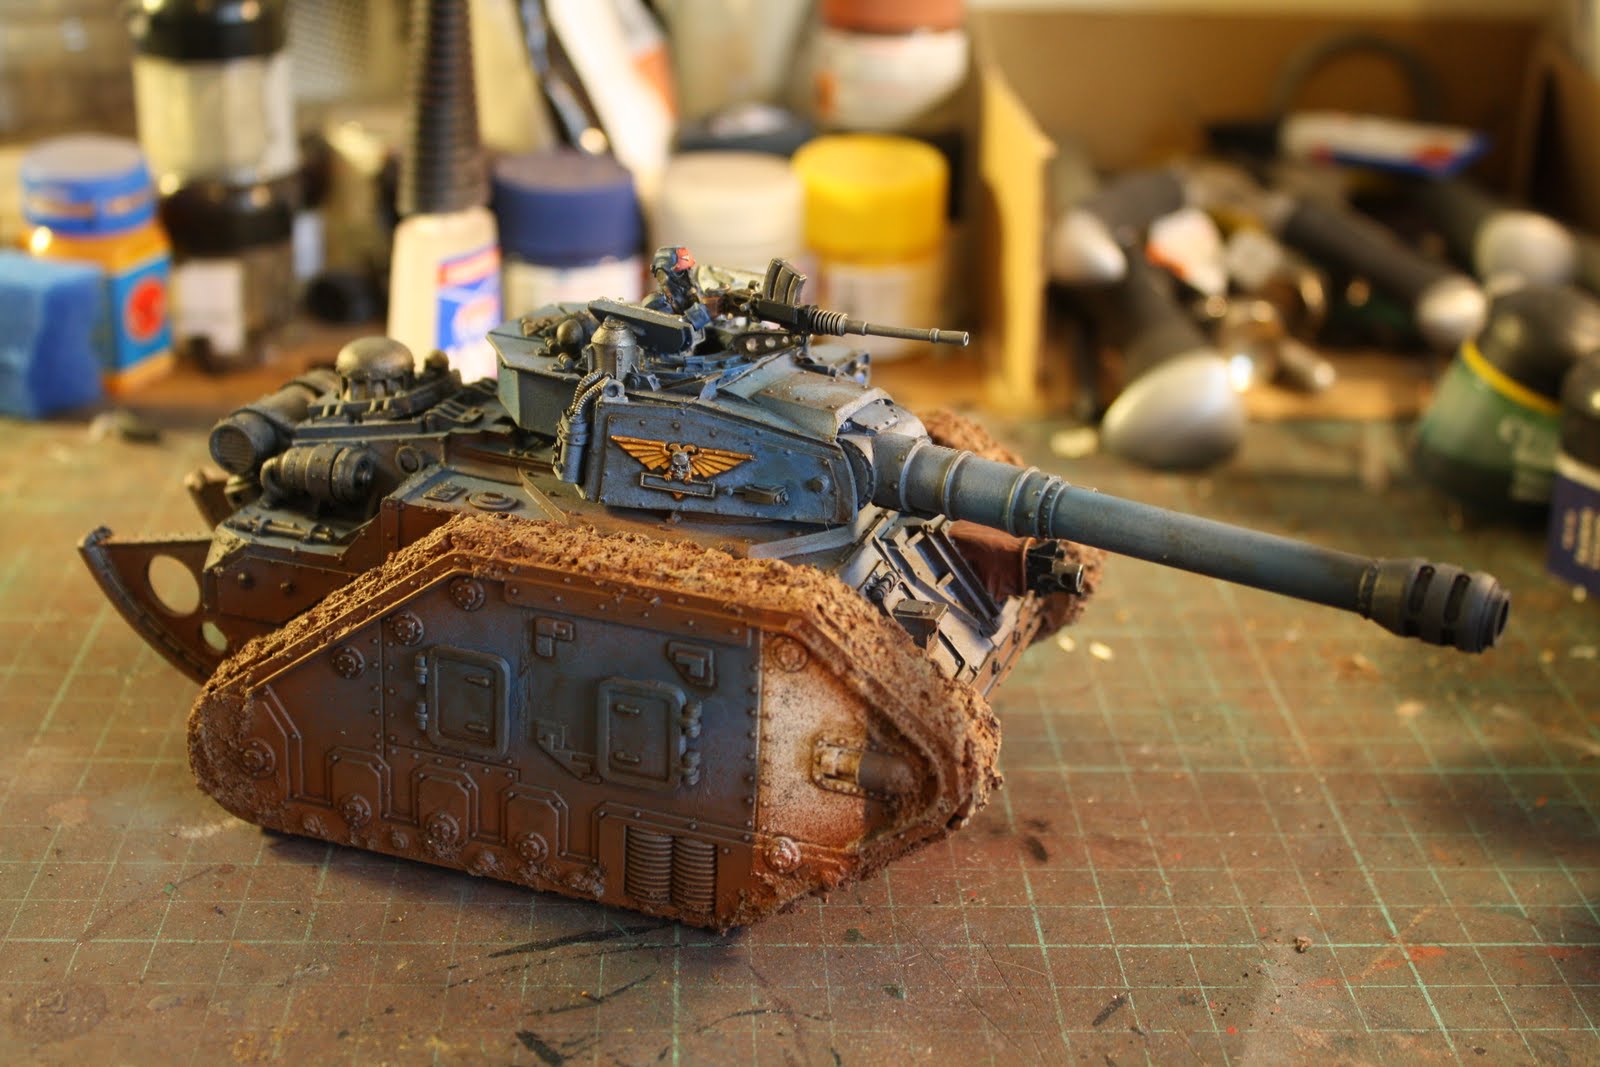
The Forgeworld Mars Alpha Pattern Vanquisher - quite possibly the coolest of all tanks! Firstly i undercoated the tank in Shadow Grey using an airgun. Afterwards i applied the mud to the tracks. This was done by mixing Horby Railway Scenics sawdust with some PVA glue. This makes quite a satisfying gloop that makes excellent mud! Apply liberally!


Once the 'mud' has dried, i then added the camouflaged stripes to the hull of the tank. This was done by applying a mix of 2:1 Regal Blue : Codex Grey with an airbrush.


Once the camouflage had dried, i moved on to paint the mud. This was a simple application of Bestial Brown with an airbrush, applied to the tracks and the immediate hull areas around the tracks (mud splatter) At this stage i also applied a white vertical stripe to the front section of the hull to signify company markings. For this i just made a template out of paper and placed it over the hull of the tank, and used a Skull White spray.


Next i wanted to create a chipped paint look. This technique was taken from the Imperial Armour Masterclass book (which i highly recommend by the way!)

Take a sponge; the foam out of a carry case is very good! Then coat the end of it in some Charadon Granite and wipe off the excess. Gently apply the paint using the foam to the areas of the hull which are likely to be worn (hull edges, hand rails, hatches, etc) This gives the paintwork a great chipped effect! I actually used a Centaur for this example. The photos of the actual Vanquisher didn't come out to well!


Once the hull is suitably 'chippy', the rest of the hull needs to be weathered and looking, like its been kicking ass in the field for a while!

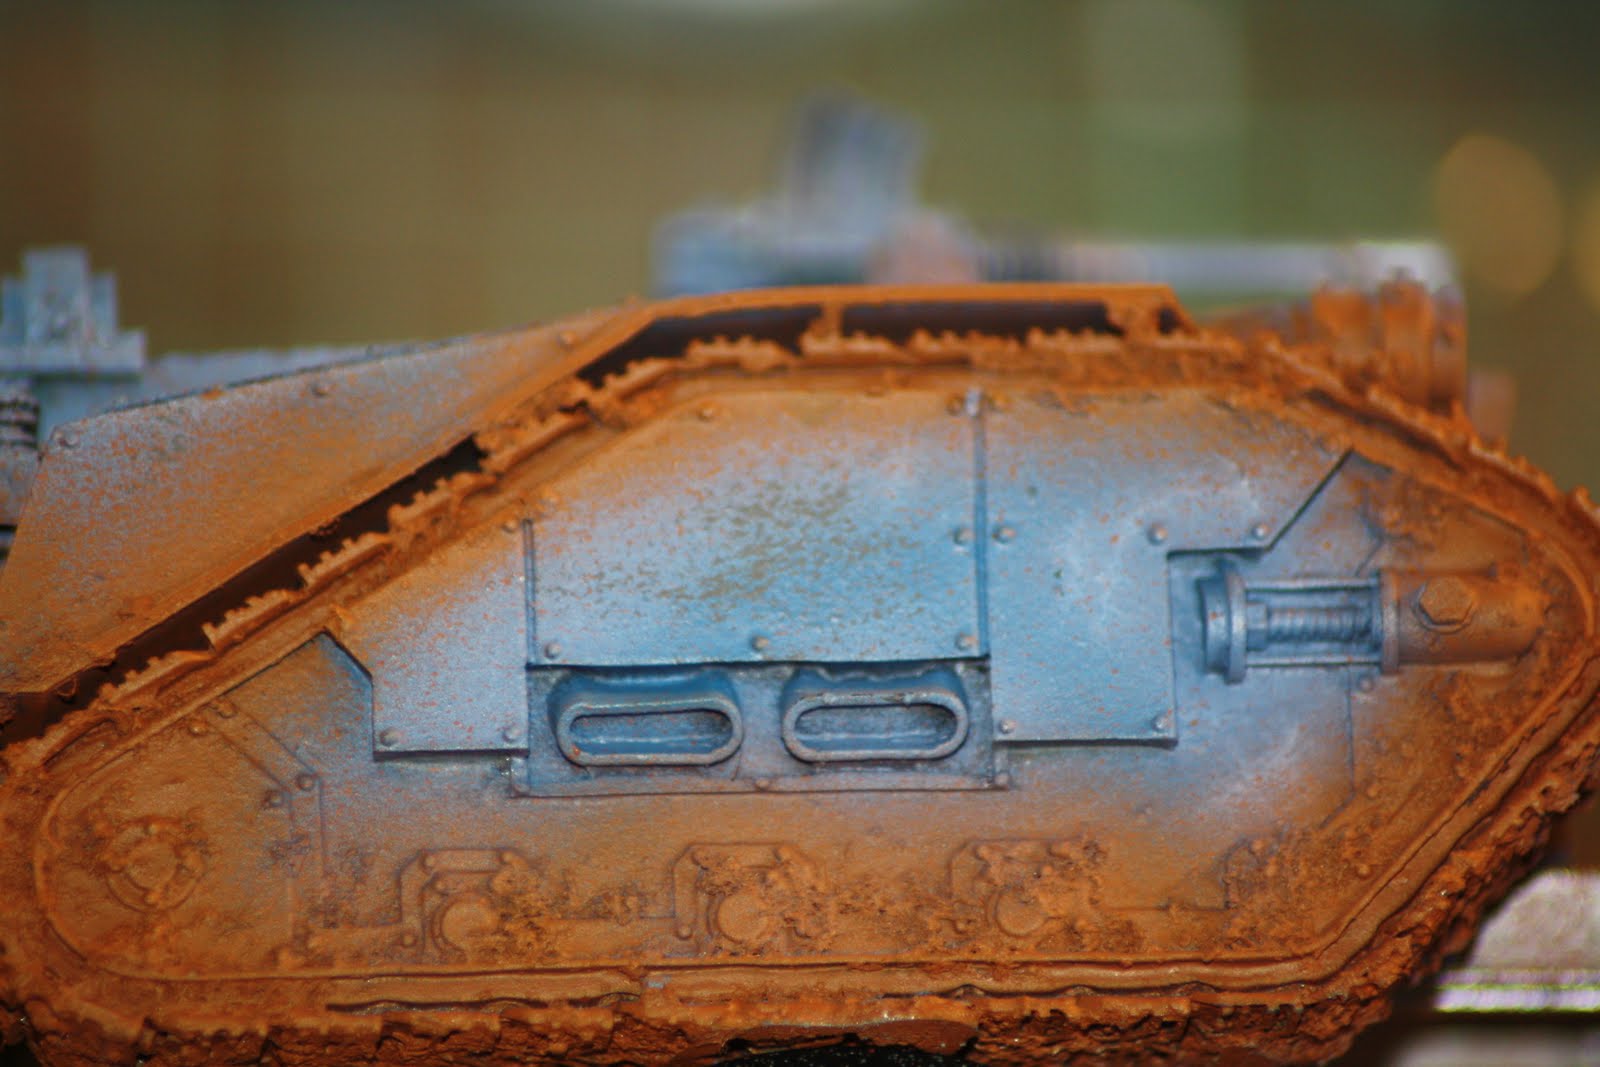
Again, this tip is taken from IA Masterclass and is quite invaluable when weathering tanks. Firstly you'll need to get hold of some Winton Oil Paints, in this case Burnt Umber and Lamp Black. Next, a suitable mixing surface. You will need to apply a small amount of the oil paint onto your mixing surface and dilute it with white spirit. The dilution is totally up to you, but the thinner the mix, the lighter the weathering you'll achieve. The thicker the mix, the heavier the effect (which can look crappy) Its a case of trial and error, but keep at it!


Once your happy with your mix, apply it to all the rivets, creases, nooks and crannies on the tank. It'll look like the accumulated dirt and oil of many days in the field, and give the tank and excellent weathered look!


For the Vanquisher i used the Burnt Umber mix for the hull, and the Lamp Black for all the metallic areas. It works equally well on both surfaces.


That's it for the weathering! Finnish off the details on the tank and your done! For the end of the barrel i used MIG Weathering powder (the forgeworld ones would also do) A very quick and easy way to effectively weather your tanks. All this can be done in just an hour or two (or three!) and the results are quite satisfying. Please feel free to ask any questions! Enjoy!

Wednesday 23 June 2010

Elysian Squad 1 Complete

FINALLY got these guys done! Wouldn't have taken nearly as long if i hadn't had some crappy shifts at work! Never mind, the end result was worth the wait! Their Valkerie Transport has been undercoated, so I'll be starting on the interior before i assemble that. Enjoy the pics!

Sargent, Vox and Demo Charge (converted to an ammo box!)


Troopers


Troopers and Grenade Launcher


Whole Squad

Thursday 17 June 2010

A Few Reinforcements.....

Now my Elysians have got off the ground, i've not had as much time (or money) for the Krieg. I have managed to get 2 Plasma Gunners done for my infantry squads, and also a fun casualty figure, which is from the Quatermaster set.

Soon i hope to get the final 2 Grenadier Squads and Centaurs, and complete this army list! Well, until i start making Apocalypse formations!! And buy more Artillery. And maybe some Gorgons. And............


Elysian Squad 1 Progress

So progress has been slow this week due to working 2 overitme shits at work! Not to worry, at £200 per shift i should be able to purchase the rest of the army in no time!!

Just got the browns, metalics, washes and highlights to do now. Probably looking at completion next week (again due to work!!)


Monday 14 June 2010

Test Model Complete

I'm definitely pleased with the result, and I'm happy with the colour scheme. It was quite labour intensive (compared to the Krieg anyway) but I think the end results worth it. I've done a Vostroyan army to, and the Elysians wont take nearly as long as they did, so i guess its not that bad!

Bought a Valkyrie at the weekend, so that's next on the list once the squads complete. Watch this space, and enjoy the pics!


Sunday 13 June 2010

Elysians Have Landed!

I have the army list, I have the colour scheme, and now i have a squad of Troopers! Forgeworld delivered unusually quickly, taking only a day to arrive! Along with a Troopers squad I also got the Special Weapons pack, as this squad will form one of my 2 Veterans squads.


Firstly, I want to paint my test model. So far I've got as far as assembling the model (not the whole squad, as my day was cut very short by shopping in Carmarthen with the misses!) In my haste, one of the shoulder pads pinged off into the void, never to be found!! (ARGH) So I used a spare Krieg shoulder pad instead. Don't think it looks to bad.


The kit also comes with a lot of accessories; pouches, knives, grenades, etc. The same was to be said with the Krieg, and i found it all a bit to fiddly! Besides, the Krieg are expected to die in the middle of no-mans land so to me it didn't make sense to load them up with equipment, only for it to lay rotting in the mud!

With the Elysians i went the opposite way. As they'll be dropping in behind enemy lines and operating without resupply, it made sense for them to be totally tolled up! Plus they look that extra bit cooler!


With the Elysians i went the opposite way. As they'll be dropping in behind enemy lines and operating without resupply, it made sense for them to be totally kitted out! Plus they look that extra bit cooler!
Right that's it for the mo! Painted example to follow!

Tuesday 8 June 2010

Krieg Engineers

Having completed the final 5 Engineers yesterday, i now have the full 10 man Engineers squad. I found that the 5 man squads were pretty ineffective in games, so i hope the 10 men will do better!


Attached to the squad is a Hades Breaching Drill. This enables the Engineers to deep strike into battle. The drill itself is basically a deep striking melta, making it very effective at taking out those pesky armour 14 vehicles lurking around the field! Once the drill has entered play, the engineers automatically arrive the following turn.

The drill is painted to a basic standard at the mo, so i just need to weather it and its complete.


Monday 7 June 2010

Regiment Name and Colour Scheme

I've had a short think about the name for this new regiment, and eventually came up with.........

141st Elysian Drop Troop Regiment "Helljumpers"

Not quite the memorable name i was going for, but i ran out of ideas! Some of you may notice the inspiration taken from Halo in there!

I also put some thought into the colours for my regiment. From the start i wanted a desert camo scheme for the army. After trawling the net for ideas, i came accross an article about the Taros Campaign from IA3, where the Elysians made their first appearance. They showed a picture of the scheme used in that campaign, and i liked it instantly! Having never read IA3, the scheme was new to me, and fullfilled my criteria perfectly!

Below is a quick outline of the scheme (those of you who have read IA3 will already be fimiliar with it) I found this healpful Elysian sketch on Google Images!!


This of course will be subject to change and adaptation, so i'll need to do a test model first to see how it really looks.  Shading, washes and highlighting will be figured out as i go along, but for now this is the intended scheme.

With regard to armour, i was going to go for a very straight forward Desert Yellow basecoat with some rust coloured feathering over the hull. Minimal metalic detail will be added (as it'll spoil the camoflage needed in this desert theatre!). Again, im sure this'll change over time.

Right, better get ordering off Forgeworld, and get some test models knocked out!

Sunday 6 June 2010

Back to the Krieg!

Im now officially 'Nidded out right now! So i've decided to turn my attentions to other projects.

It occured to me recently that i havent even written a list for my Krieg army. For the last 2 years i've just been collecting with no clear purpose in mind! I quickly knocked out a 1750pts army (for which i had most of the units!) and only needed 3 more units to make it complete. On that list was two 5 man Grenadier Squads with Meltas and a Centaur, and a 10 man squad of Engineers (which i have 5 of  already).

On the table now, 5 Engineers. These boys should be complete by the end of tommorrow. Then it'll be onto the Genadiers (once i've taken out a massive loan to pay for them!)


Also recently completed was a Death Korps Vanquisher. This guy is going to be the Company Command Tank for my Armoured Regiment. I rushed this guy out for an Apocalypse game, and had been sitting on my shelves for about a month before that! The Armoured Regiment is a project thats been slowly cooking for a long time now, and with the arrival of the Elysians, will remain slowly cooking for some time!


I've also started a new blog for my Elysians; Prepare to Drop! you can visit that blog and follow the creation of a new Elysian Regiment here:    http://elysiandroptroopers.blogspot.com/