Since the release of the new HH: Massacre book I've had my eye on the Forgeworld Hyperios Weapons Platforms for some extra anti-air for my Heresy Death Guard. That being said, I don't want to fork out for 'optional' units for my list when the list is made up entirely of Forgeworld units!
In an effort to save some pennies and redirect funds towards more vital units, I decided to make my own Hyperios! There are a lot of DIY Hyperios on the internet, most of which consist of the Valkyrie Multiple Rocket Pods mounted on some kind of base. If you want a quick and easy conversion, then that is your best bet. I however, wanted something a bit different!
Now, if your an avid IG player you'll probably have most of these parts. If not, you might have to trawl through eBay for bits, or find a suitable substitute.
So, start with an Icarus Patttern Lascannon from the Bastion/Aegis Defence Line. You'll need the base and the turret supports. There is obviously a gap between the supports so you'll have to fill it with something. I used a piece of plastic plumbing hose. This forms the bulk of the platform.
Next up is the missile housings. You'll need to grab your Valkyrie spare parts now, and identify the parts below. These are the weapons housings for the side of the cockpit.
Then grab the sensory panels that are optional for the weapons housings.
Assemble the parts. Normally these would be fixed to the side of a cockpit, so one side is left open. Seal up the sides with plasticard and fill the gaps with Milliput.
You now have the main platform and the missile housings.
Next grab these two bits from the Valkyrie sprue. These are usually used to mount the sponson heavy bolters on the Valkyrie. They'll be used to join the missile housings to the main platform.
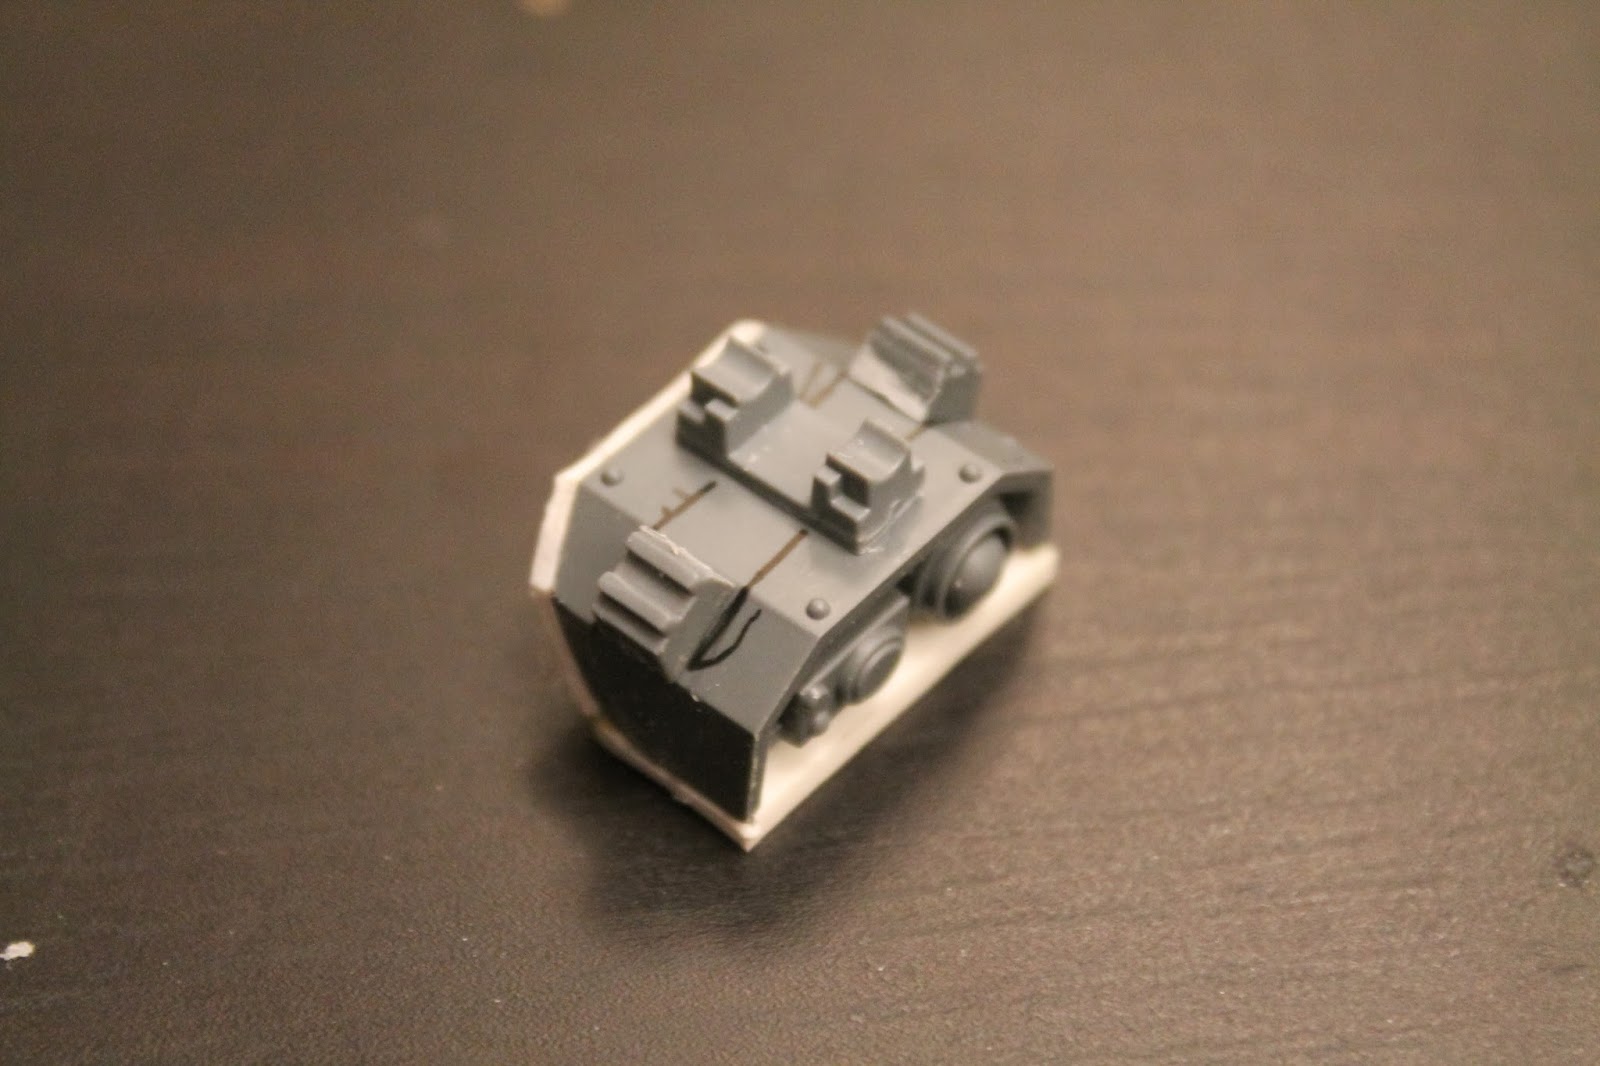
To make life easier, you'll need to drill a few holes! Firstly, make some holes in the sides of the missile housing. Be sure to measure and make sure the holes are in the same place on each of the housings.
Do the same on the weapons platform. This is a little more difficult as there is some detailing that you'll have to shave away (but as you can see this doesn't always lead to complete accuracy!)
The small cylinders you grabbed earlier can now be glued into the holes on the platform. The missile housings can now be easily mounted. But first you'll need to finish preparing them by adding the mounts for the missiles.
Now, I only had 4 of these pieces, but if you can find yourself 6 then great! They are from the Bastion kit, and are used to mount the Heavy bolter turrets.
I used these bits, which are from the Valkyrie kit. These will need a slight modification.
Cut the piece in half, discarding the t-bar piece.
You should be left with these for the missile mountings.
Take the first missile housing and glue on the large bit first. Make this as central as possible.
You can now use this as a guide for the smaller pieces, to ensure your mountings are symmetrical (or as close as they can be!) I drew on some lines with a ruler to help me with this.
Next glue on the smaller pieces, ensuring the parallel ridges are facing forwards. The missiles will be sitting on these.
Repeat the process for the other missile housing.
You can now attach the missile housings to the weapons platform. You could be clever here and use magnets to keep some movement in the piece, but I just glued them straight on. Don't forget to position them at an upward angle, or your missiles will hit nothing but grass!
Next its the missiles! You could use anything here really, but I chose to use the Hellstrike Missiles from the Valkyrie set, as I had loads of them!
You'll need 6.
Now glue them to the missile mountings, ensuring the missiles are straight.
Repeat for the other housing.
Now you just need the targeting gear. Grab an Icarus Lascannon/Quad Cannon sprue if you have one.
You looking for this bit.
Cut off the parts on the underside so the piece will sit flush on the missile launcher.
Now glue to the central part of the platform at the same angle as the missile housings. The idea is that the central section rotates up and down, which of course includes the missile housings and targeting systems.
Now your done!! Repeat as many times as you like, or as your bits box allows!
Ideally id like to mount the platform on these bases.
I've got 2, but my Long Barrelled Quad Autocannons are using them at the moment, and are guarding my Defence Laser: Heratics Bane! A buddy of mine has 2 I can have, which i'll pick up soon. If you don't have them, I think they look just as good without.
There you have it! If you have a go building these let me know how you got on. I'll be painting up these bad boys soon, probably in Death Guard colours. I may add some Mechanicum icons as well just for flavour!
The GunGrave