Renovations on the house have kept me away from models and hobby in general for a few weeks. I have been thinking a lot about it though, more specifically my Heresy Alpha Legion.
Firstly I've been looking at alternative color schemes (more on that soon!) I'm not convinced i'll change the scheme, but i need to scratch that itch before i continue painting any more.
The other thing I've been pondering over is bases. I generally put a bit of effort into my bases, especially the larger ones. However, i kept looking at my Alpha Legion and thinking that something was missing. They were quite bland. I did a quick trawl of the internet to get some ideas and found a great tutorial from Third Eye Nuke Studios on how to paint urban bases. I highly recommend it! I couldn't replicate their tutorial completely (i'm waiting for spare parts for my airbrush) but i did try my best to do so using weathering powders.
Below is a Destroyer. I had used some weathering powder on the Destroyer bases, but they did little to make them more interesting.
So what i did (using Third Eye Nukes ideas) was add some black weathering powder to the recesses of the base and anywhere i could achieve a good contrast between the powder and the grey of the base. Then i added some dark rust colored powder over the top of it (sometimes mixing the two before application) This is what the base looks like now:
I think its a big improvement! Golden Daemon statues didn't start falling from the sky, but it just makes the base a lot more interesting and gave the overall appearance of the model more depth. I also took some proper photos in the light box so you could see the effect better.
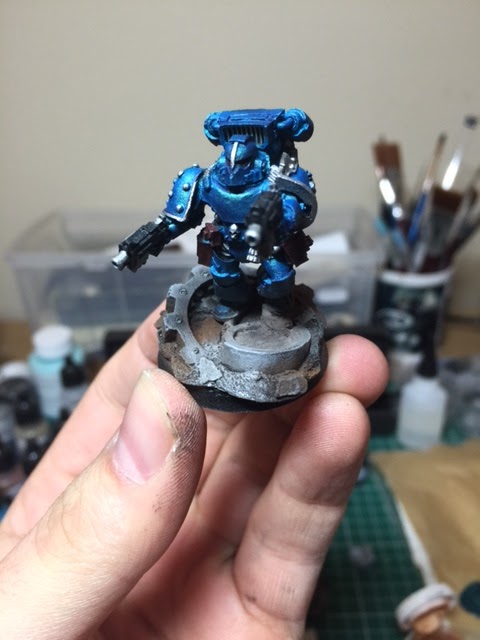
After thew Destroyers bases were 'treated' i moved onto the Tactical Marines i'd done.
Again, mode depth and better contrast, making the base a bit more interesting! I'll be giving Third Eye Nukes technique a proper go once my airbrush is operational again. I'll let you know how it goes.
How do you do your bases? Do you have any good tricks that can supplement this method?
The GunGrave
Showing posts with label Tutorials. Show all posts
Wednesday, 8 March 2017
Monday, 5 October 2015
Hazard Stripe Tutorial
So before i did the hazard stripes on the second Knigt Styrix, i did a bit of research on how i could jazz up the stripes. They would draw a lot of attention from the eye as they contrast so starkly with the red of the hull, so i wanted them to be a bit more special.
The tutorial i decided to follow was from Spikey Bits blog. I loved the technique, although long winded, and really wanted to give it a go. You'll need an airbrush and some suitable paints to use in it.
First up i had to tape up the shoulder plating. this was no easy task over an uneven and curved surface! In light of this i know the stripes arn't perfectly straight. But by the end of the process (and this was actually my 3rd attempt at successfully hazard striping these pieces!) I'd had enough!
So first stage was a layer of Vallejo Game Air Beastly Brown. Black is far to dark to apply yellow straight over, so you need to build it up from black to make sure the yellow actually looks yellow!
Next was Leather Brown.
Now it was time for a bit of yellow. A layer of Gold Yellow was next. I was careful to leave a bit of the brown showing at the edges of the stripes to create some contrast.
Now, to make sure the yellow achieves its full colour a layer of Dead White was applied over the yellow, again carefully leaving some darkness at the edges.
A second pass of Gold Yellow. You can see the difference here from the first pass of yellow.
Now we've had 4 passes of colour with the airbrush so the contrast could be a little overpowered by now. To make sure I got the contrast i wanted, i gave the edges if the stripes a thin pass of Beastly Brown again.
Then i softened up the edges of the contrast with some more Gold Yellow. Looking back i think i should've been braver with the contrast here - i think i didn't leave enough brown.
And that's it! It does seem a bit of a long winded process, but the layers of paint are so thin they dry quite quickly. I sped things up a bit with a pass with Mrs GunGraves hairdryer between layers.
It looks a little messy at this stage...
But once i got the trim on it looked a lot better!
If i have occasion to do this again then i would definitely make more of an effort on the contrast. Not bad for a first attempt though! I'm looking forward to finishing the Knight and seeing the plates on properly.
The GunGrave
Tuesday, 22 September 2015
Heresy Rad Phage Markers
I now have a few weapons in the Mechanicum arsenal that pack Rad Phage (or Space cancer as its more commonly known!!) If a model suffers an unsaved wound from a weapon with the Rad Phage rule, then it suffers a -1 toughness for the rest of the game. not much use against single wound models, but great against character models, maybe even Primarchs! Over the course of a game, this could be a pain to keep track of.....time for some markers!
The initial idea was to sculpt some skulls onto 28mm bases.....humm, way to much effort! So i started to rummage through some of the really old bits boxes, ones that have a thick layer of dust on! I distantly remembered casting up some skulls years ago, and knew there was a bag of them somewhere. Thankfully i found them. These skulls are casts of ones that came with the Reaver Titan. At the time i must have thought they were cool and cast up a bunch of them, which I'm very glad i did! There were 23 in the bag - these would be perfect!
White is a bit boring, so i went with a simple green scheme to liven the markers up a bit - the colour of Space Cancer!
First up they were undercoated in black (Army Painter) Sorry for the sideways pics, i don't know why they do this sometimes!
Then a blast of Vallejo Game Air Sick Green.
Then a smaller blast of Vallejo Game Air Livery Green.
And that's it! Some nice green Rad Phage markers.
I'm glad i went with these and not skulls on 28mm bases as they would have been way to big. These skulls can sit quite nicely next to the unfortunate models now riddled with Space Cancer!
The GunGrave
Friday, 7 August 2015
Legion Vehicle Sponson Caps
So this is a cool idea that I originally saw on Mordian 7th's blog a few weeks ago. It was a cap that covered the weapon sponsons on Legion vehicles when the upgrade wasn't in use. I liked the idea so much i decided to give it a go myself!
So i started off with a 28mm base (these are the old ones mind, not the new larger GW ones) I sanded the surface flat to give it a smooth texture.
The base on its own is a bit bare, so i needed to add some rivets. I saw a rivet technique a few years ago that i wanted to try. It uses layers of PVA glue to create the rivets. I applied the PVA with a toothpick.
Simply dot on the glue where you want to rivets to be.
It only takes about 10 minutes to dry in the sun. I found that i needed 3 passes with this technique to ensure i got enough height with the rivets. With such a short drying time it wasn't a problem.
I then added some Legion iconography.
Painted it in the colours of the Legion!
And there you have it. I did of course forget to mention that this cap is magnetised, but i guess that goes without saying. As you can see the cap does protrude a bit from the hull of the tank. This is due to the way i built the tank. Only part of the assembly for the sponsons is magnetised, meaning that some of the assembly is glued to the hull. As this is a retrofit i couldn't rectify this. I don't think it looks that bad though!
I will probably make another set or two of these for the other Sicarian model of tanks. Give it a go yourselves if you like the idea!
The GunGrave
Tuesday, 9 September 2014
The Sands of Istvaan 5 (1)
Me and some buddies are planning to run through all three of the Istvasan campaigns in the Horus Heresy books, probably at the beginning of next year. Although i have a sizeable Death Guard force, the others are still building their armies. In the meantime, I've set about preparing the battlefields!
All three of the campaigns are set on the red sands of Istvaan 5; the initial assault buy the Loyalists, the ensuing massacre, and then the hunt for the loyalists survivors. This makes terrain building a fairly simple matter, with one terrain set being applied to all three campaigns. This being the case, i started with something simple: rocks!!
For these i used a plywood base cut to size. Then I used spray on cavity insulation straight onto the wood base. Now this is an expanding foam, so the amount applied was only about 2/3 of the final size. As you can see below, its not very rock-like at the moment, but this is going to provide the raw structure and shape of the rocks. This one was build over two layers to achieve the height.
Once dry (2hrs for a good set) I started carving out basic rocky shapes into the foam. I used a saw for this which was much easier than using a scalpel (the ones shown below are not the same as the one above FYI)
The shapes of the foam gives a nice texture to the rocks, making for a more natural looking formation. Adding the sand adds additional texture.
Some more examples of the natural texture of the foam.
So far i have these three rock formations done and ready for painting. The colour will require a little thought in order to achieve the right shade of red, but the HH books should help me with that.
I have a lot more formations to finish! The ones here are much larger than the ones above. I also have plans to make some formations with integrated fortifications to represent the Traitors emplacements prior to the Loyalist assault!
I'm very excited about this project - it's really going to bring 30K to life!
The GunGrave
Thursday, 13 February 2014
Tyranid Capillary Tower Tutorial Mk II
So after the initial experiment making a Tyranid Capillary Tower i decided to have another go, further refining my technique.
Firstly, base your quartered polystyrene cone. This time i used a pre cut wooden disc as the base (which looks much neater!).
To help create the effect of broken ground around the base of the tower, i glued some foam pieces around the base to assist with the effect.
Once they dry, start cutting the ridges into the back of the styrene piece. I roughly measured out the spaces to create a roughly uniform look. These will just provide a guide for when the clay is applied later on.
Once the ridges are cut in, take some air-drying clay and begin to coat the back of the tower. Make sure you coat the tower in a reasonable thickness of clay as this will help you cut details into it later.
Coat the foam at the base of the tower in clay as well to create the broken ground effect.
Once your happy with the shape of the clay, carefully cut some ridges into it, following the cuts made in the styrene foam earlier. For this i used the back of a kitchen knife.
The clay will take roughly 24hrs to dry and i recommend waiting before moving to to the next step, otherwise you'll end up putting finger marks in places you really don't want them!
Once your happy the clays dry, take some basic polyfilla (or similar). This needs to be applied to the front of the tower. I watered down the filla with water in a 50/50 mix. This obviously makes it more runny, and will hopefully give the filla a more organic look when dry. Try to cover every surface of the styrene so it doesnt melt when you spray it later on!
Give this an hour of two to dry before adding some texture to the front of the tower with some medical gauze soaked in PVA glue. At this stage you'll also need to add some 'spikes' in the front of the tower. You could use anything for this, as long as its vaguely pointy!
This is great at creating an organic feel. Make sure you stretch the gauze between different sections of the tower. Base the tower with some sand, and your build is complete!
Give it another 24hrs to let the gauze dry and get painting! I went with the same colour scheme i used for the rest of my 'Nid army, but you might want to go for something more neutral.
After painting and varnishing i added one final touch - slime! I did this using a hot glue gun, stringing the glue between different sections of the tower. Do this after varnishing, otherwise the glue would go cloudy with the vanish.
I couldn't decide whether to go with spots or stripes on the back of the towers - what do you guys think?
Scale shot with the Crusher Fex!
A close up of the 'slime'. This was really easy to achieve, i think it really makes the towers pop!
There we have it. There's another 7 Towers at different points of construction on the table at the moment, as well as the Spore Chimney which is now half painted. More on the terra-forming efforts of the Hive Mind soon...
The Gungrave
Subscribe to:
Posts (Atom)